Guitars in Progress, Film at 11
I’ve been building four, five, and six-string taper core necks for the last seven or eight weeks and thought it was time to share some of the steps I’ve been going through. By the end of this entry, you’ll hopefully know what in the heck a taper core neck is and why I think it’s one of the truest and best ways to build a bass guitar neck.
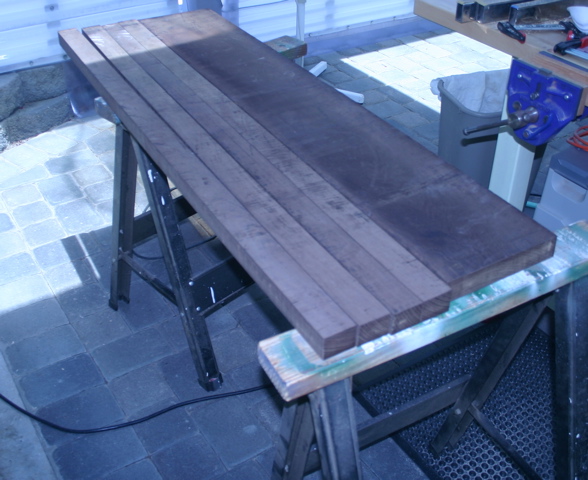
The first photo shows some Wenge lumber in the rough. These boards are 1 1/2″ thick and 48″ long. Wenge to me is a magic wood that produces a throaty and yet focused lower mid and a really dynamic low while still maintaining a clear defined upper range. All I know is that I’m never sorry when I’ve used Wenge on any part of a guitar I’ve built! As you can see, it doesn’t look too promising in the rough. When the driver delivered the boards, he asked me if i was building a fence. Yikes, I’m afraid the fence would be worth more than my house!!
Building a neck with tapered boards is a good deal harder than working with parallel boards. Any time you throw your boards out of square, you’re in for some fun! So why am I bothering to do this? Well actually that’s a pretty good question. (I knew you’d be asking, so to avoid embarrassment, I have come up with some answers.)
First off, a taper core neck looks very cool. It’s beautiful to look at the back of the neck and also see it come through the front of the body as a long graceful taper. It gives the guitar an aerodynamic look. (like you could put it in a wind tunnel and it would travel well over 200 miles an hour!)
But there’s much more to it. When the core is tapered, the grain in all of the boards, more closely aligns with the string direction and of course the vibration of the strings. I experience the sound from a taper core neck as being more focused. This more accurate grain alignment produces longer sustain and a clearer sound with less potential for cross grain wave interference, resulting in the cleanest transmission from tuning peg, to nut, to bridge. I admit it’s a subtle difference over a parallel laminated neck, but high end refinements of most things come in small percentages at the top.
I always work from a full scale pattern. This helps me to visualize and avoid mistakes, and takes the guess work out of the angles I’m using. I can lay the boards right down on the pattern and confirm that I’m getting absolutely perfect angles. On a neck through bass, the neck is it’s narrowest at the top of the headstock and gets progressively wider as it works its way to the base of the body. Basically it’s a 48″ long continuous taper. Usually that taper is achieved by using a solid piece of wood for the neck or building the neck out of parallel laminations and then sawing the taper on the outer edges of the neck block.
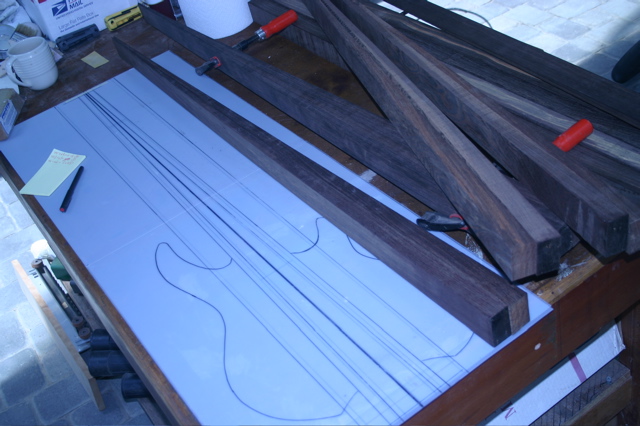
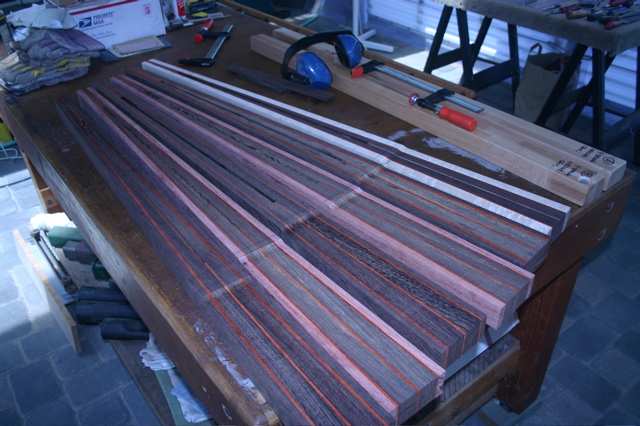
The way I build a taper core neck is to first cut two tapered boards, (always quarter sawn for stability and a book match of each other for perfectly opposing tension). These two tapered boards run down the center of the neck with a thin accent strip separating them. (this middle strip gives me a nice centering line for every measurement and sighting I will do in the assembly of the guitar) For a seven lamination neck, I next add two more thin accent strips to the outside of the tapered boards followed by two thicker parallel boards that will comprise the outside edges of the neck. As you can see from the picture of the strips of wood in the gluing jig, I have two additional boards next to the clamps that are part of the clamping jig. These boards are the complementary angle of the tapered center core boards to bring the neck assembly back to parallel, allowing me to clamp squarely when gluing. I also use these jig boards to run along the fence when I band saw the core to maintain my 48″ taper.

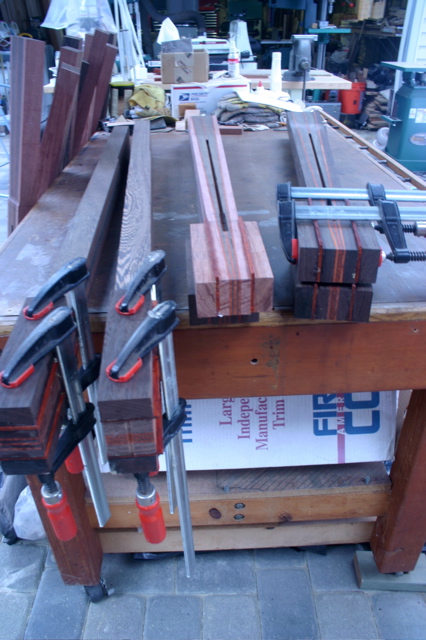
Of course the next thing is to use way too much Tightbond glue and squeeze the clamps until you make a mighty mess. I seem to maintain about a 50/50 ratio between glue that goes into the joint and glue that I end up scraping off of the outside. I’ve never completely decided whether this is wasteful or pure genius to assure yourself that you’ve gotten complete coverage throughout the joints. We used to cheer when the glue drips hit the floor in eighth grade wood shop. I’m probably just wanting to relive this amazingly sophisticated thrill from my youth!!
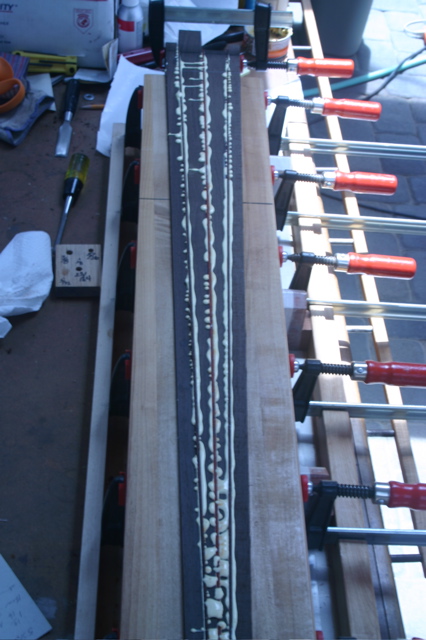
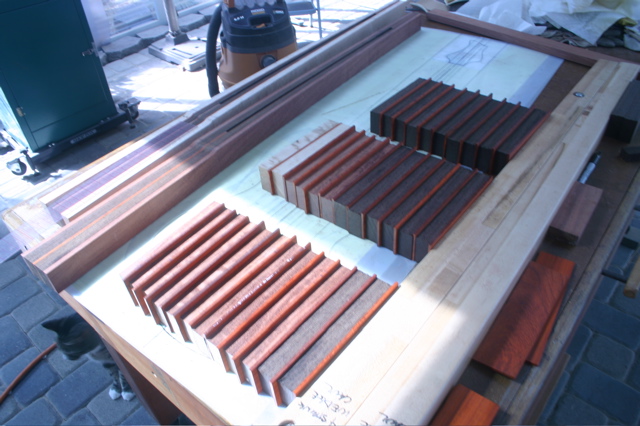
I use different pairs of tapered boards for gluing four, five, and six string necks since the tapers are different for each. Even though I work in California where the air is generally warm and dry, I try to allow at least 48 hours of drying time before I remove the clamps. That’s probably complete overkill, but I figure it takes a long time for the moisture inside the glue to escape and I’m doing everything I can think of at all times to make these necks as perfectly straight as possible.
I now have tapered laminated blocks roughly 48″ long by two inches thick, with a width that varies from something around 1 3/4 ” at the headstock on a four string to as wide as 4 1/4″ at the base of a six string.
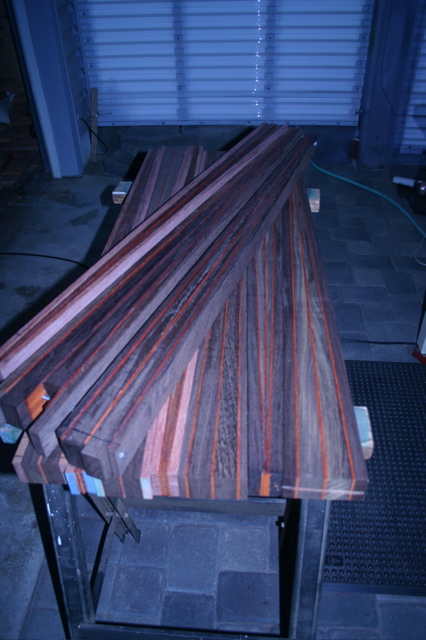
I next joint, surface and thickness sand the necks to dimension. I route a channel down the center of each neck for the truss rod, again using my tapered jig boards to guide the router. I joint roughly 3/16″ off the top face of the neck where it intersects the body. This allows for proper spacing of the bridge, pickups and string heights when the guitar is assembled.
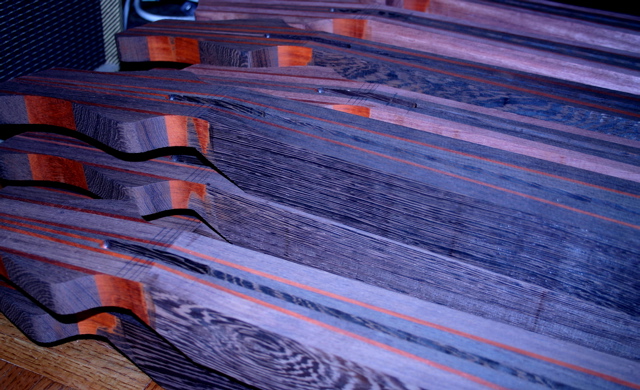
My next step is to laminate headstock wings to the top of the neck. I’ve decided on this particular set of necks to laminate an accent strip and a thick strip on each side of the neck in keeping with the overall neck lamination scheme. As I’m typing this, I’m just realizing that at the headstock, that makes 11 laminations going from one side to the other. I was pretty sure I was reasonably sane before this dawned on me. That’s just crazy now isn’t it?? (but it looks very cool) Okay, moving right along………….
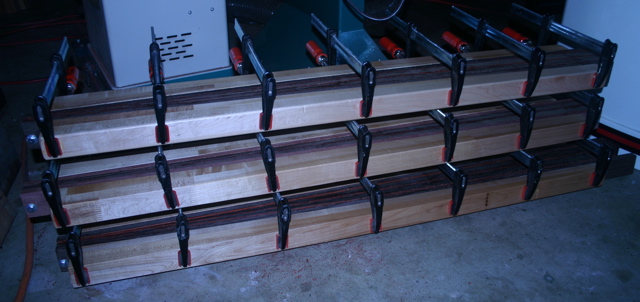
So on this next picture we see the headstock end. Yep, there are 11 laminations there! Every time I do a major gluing like this, I end up buying more clamps. Come on you guys, you can never have too many clamps, right?
This next photo is of five six-string necks – all built with layers of Wenge and accent strips of Padouk. Besides the beauty of these laminations and accents, this gives the neck an amazing stability in all directions.
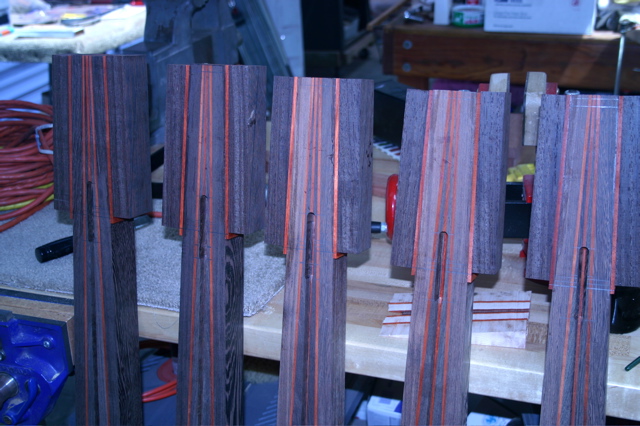
The next laminating step on these necks will be to add a veneer on the headstock to match the body top. This headstock veneer will actually tuck under the fret board so it has to go on before the fretboard. I have now cut and sanded the headstock angle on the front and back of each neck. I left it extra thick at this point and I’m leaving the neck as a block until I’ve glued on the headstock veneer and fret board as this makes it easy to clamp.
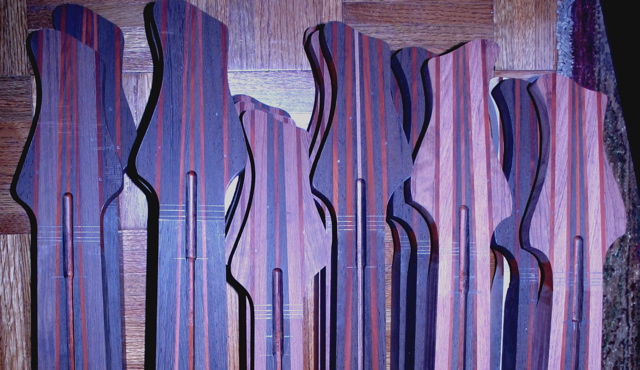
Here is my little army of necks getting ready to do battle in the big world of music. Can you find the left handed neck?? That wasn’t so hard was it?
I’m now starting to select body woods as that obviously has to happen before I can know what the headstock veneers should be. So this feels like I’m coming to the end of a chapter. I’ll pick it up next time with the operations on the fretboard including radiusing, fretting, abalone side markers, and the selection, lamination and cutting out of the body wings. But wait, there’s more! There’ll be the carving of the neck, the carving of the bodies, drilling for the tuning pegs, ………………….
Stay tuned and we’ll go through every phase on these guitars until they’re complete. All the best, Randy