The following 24 photos document selected steps on the road to building Edwin Oliver’s Cocobolo 5 string bass. There are of course many steps that are left out but I think you’ll get some insights into my process by the ones that are documented here.
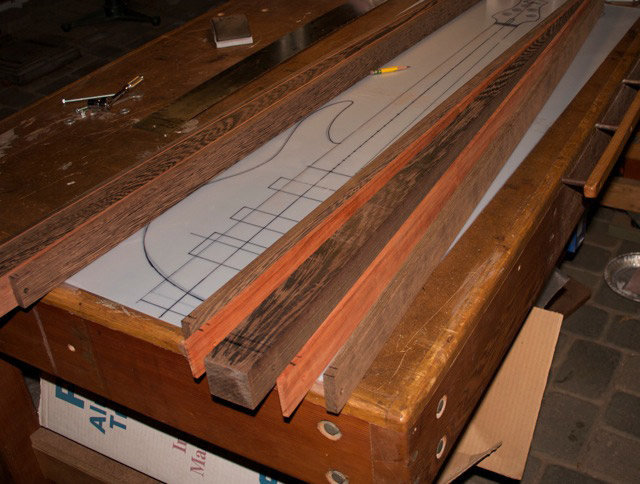
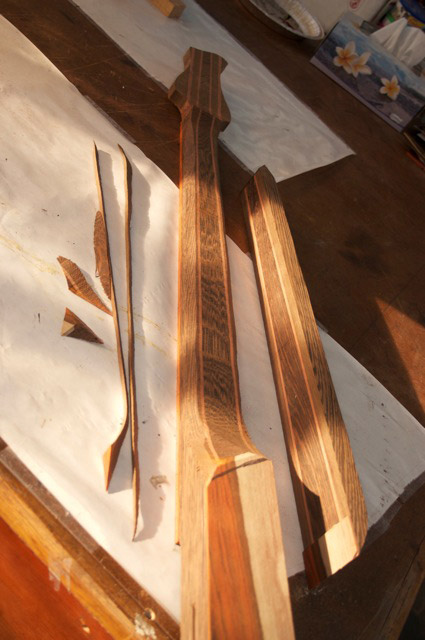
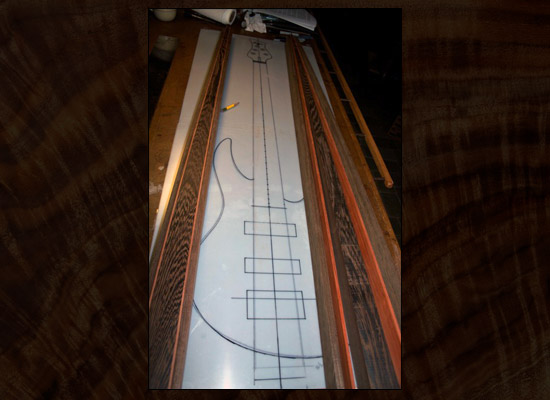
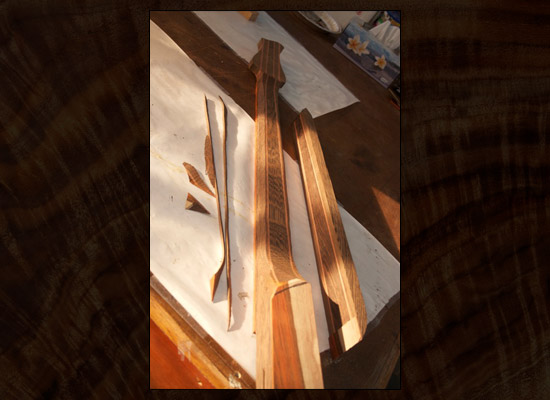
This first photo shows a full scale plan that I make for each bass. Two necks in strips are ready for lamination.
click image to enlarge
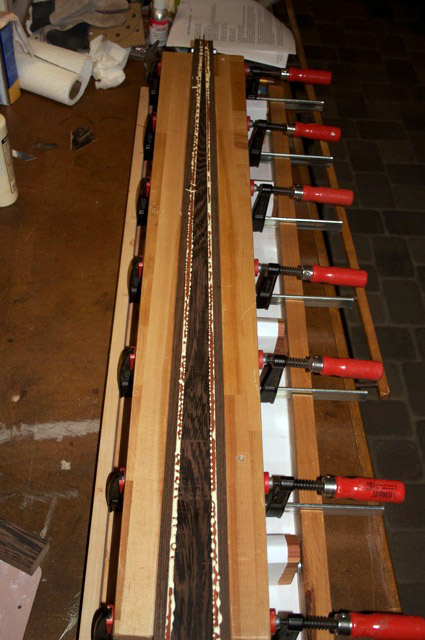
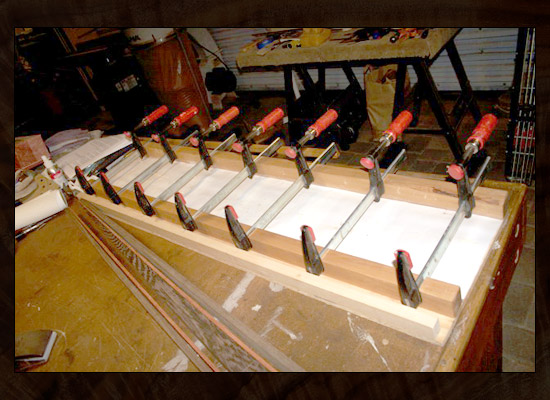
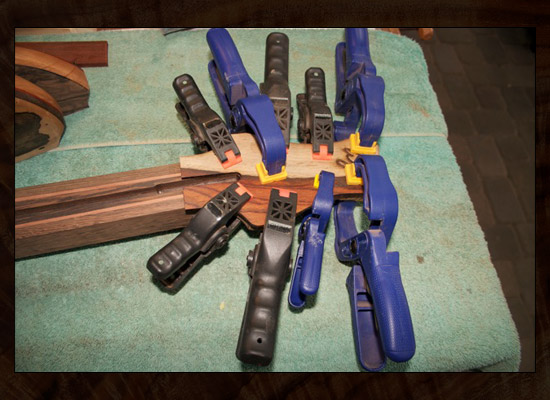
This is my neck lamination jig. Since I do all of the work myself, it holds all the clamps in perfect alignment while I assemble the strips with way too much glue on them. My motto is “Never enough clamps, never too much glue!” This motto has served me well over my woodworking career.
click image to enlarge
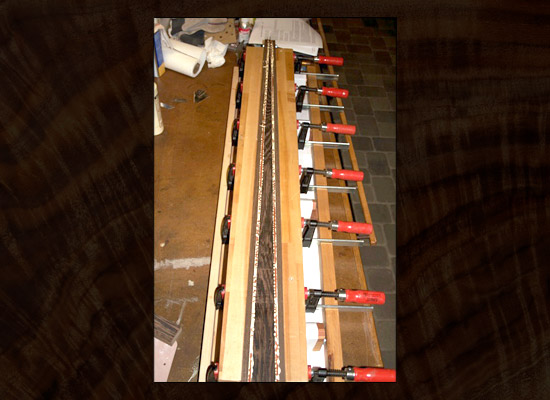
Here, Edwin’s neck is clamped in a taper with opposing tapered boards to allow the clamps to be parallel. I have many theories on why taper core necks are great besides the fact that they look very cool having to do with grain and string alignment as the neck tapers toward the head. But putting one together can be some kind of fun. The glue makes everything want to slide along the taper. I have learned a number of tricks along with a number of new swear words to help me accomplish this task.
click image to enlarge
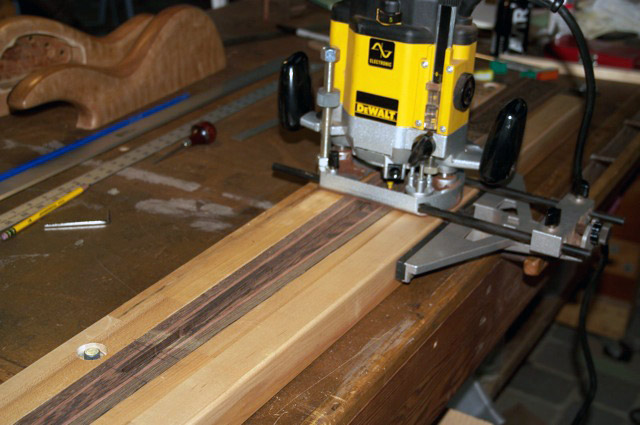
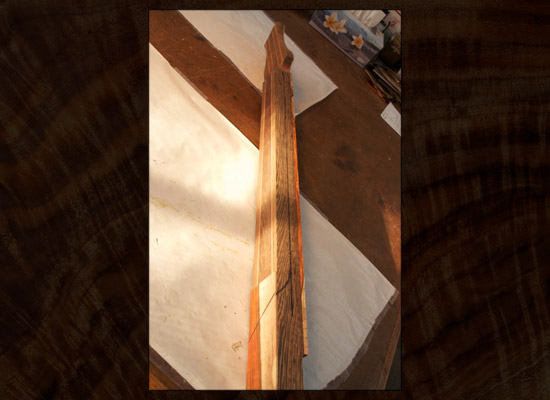
Here I’m routing a channel for the truss rod. I do this with my opposing tapered boards clamped to the neck so that I have a fence that I can run along to put the channel squarely down the middle of the neck. I will laminate on side boards for the headstock after this is accomplished as having the headstock on the neck at this point would be in the way of my fence. One of the key things to guitar building is to really figure out the order of every step. If you flip the order, you can really box yourself into some corners. Again, the value of the new swear words (not really).
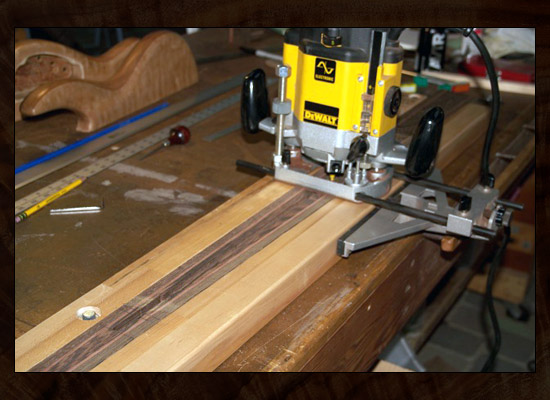
click image to enlarge
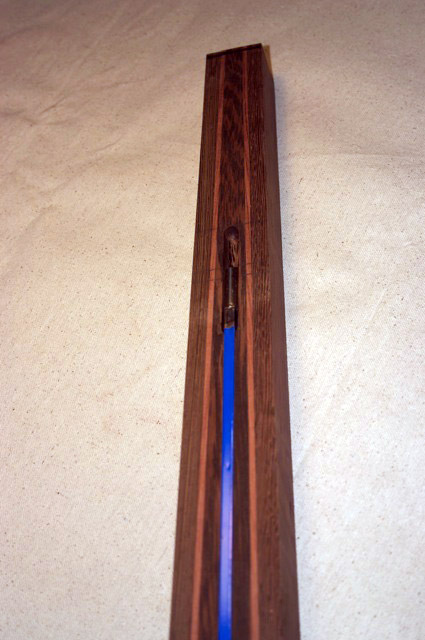
The blue item with a chrome end is the truss rod. As you can see, there is no headstock yet, just one narrow taper.
click image to enlarge
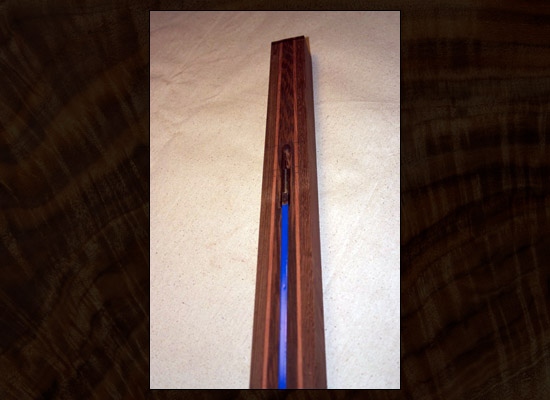
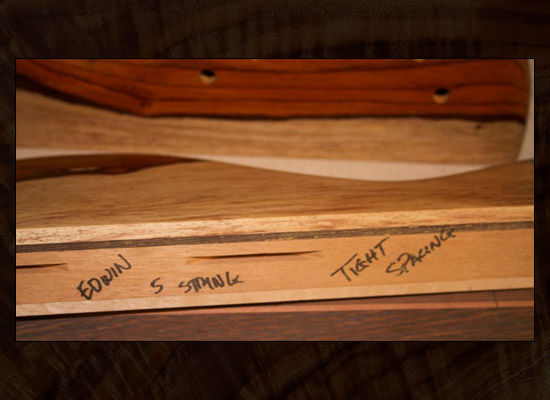
At the top headstock end, the channel must widen and deepen where the round barrel emerges to allow for tightening access with an allen wrench.

click image to enlarge
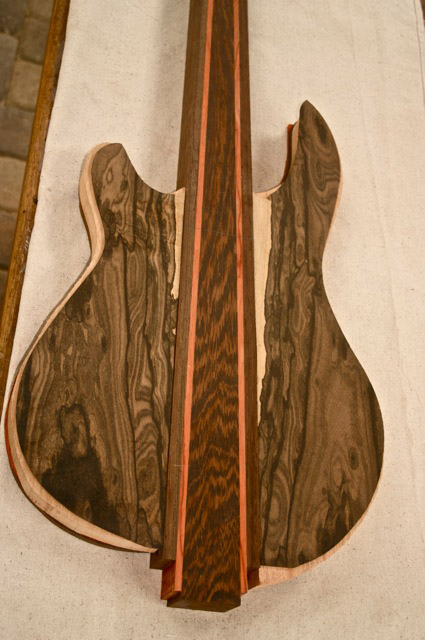
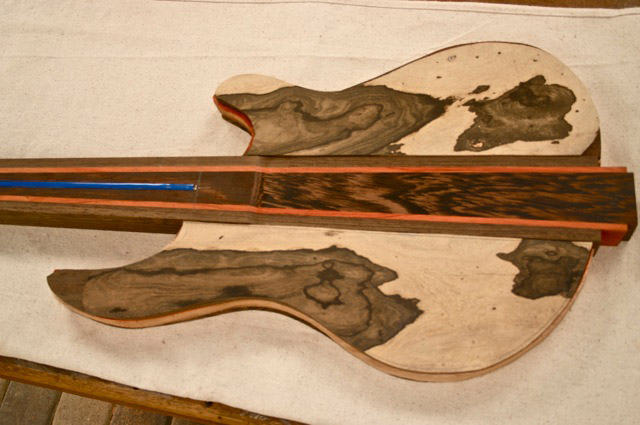
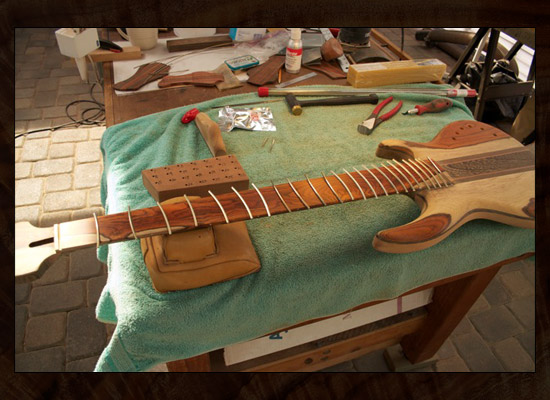
Here I’ve done a set up. I just set the fretboard wood on top of the neck and placed the wings next to the neck to photograph and send to Edwin for his approval. Since many of the basses I build are for people far away, I do many set ups along the path and send them photos to keep them in the process and to make sure that we’re on the same page.
click image to enlarge
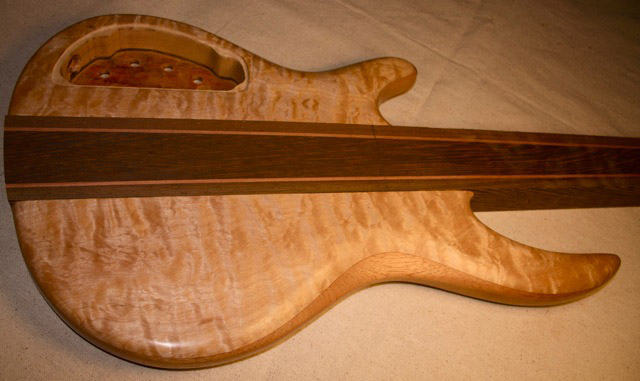
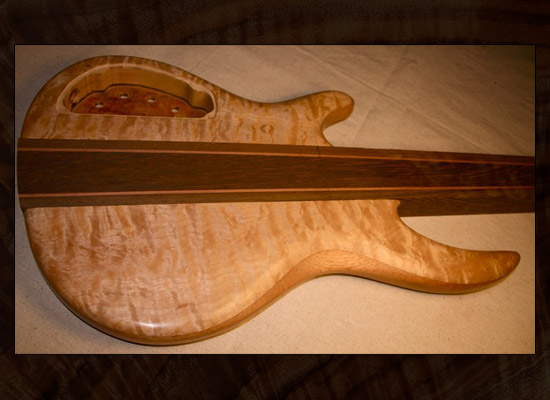
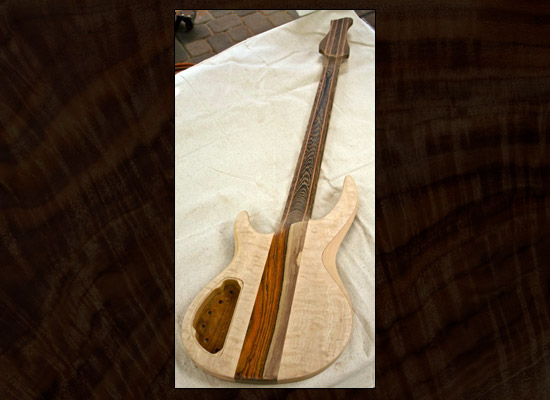
I of course had laminated and cut out the body wings before this set of mainly neck photographs were taken. I laminated a quilted maple back onto the wings and have routed out for the electronic components as well as drilling holes for the controls. The neck at this point is just one square heavy chunk of Wenge and Bubinga.
click image to enlarge
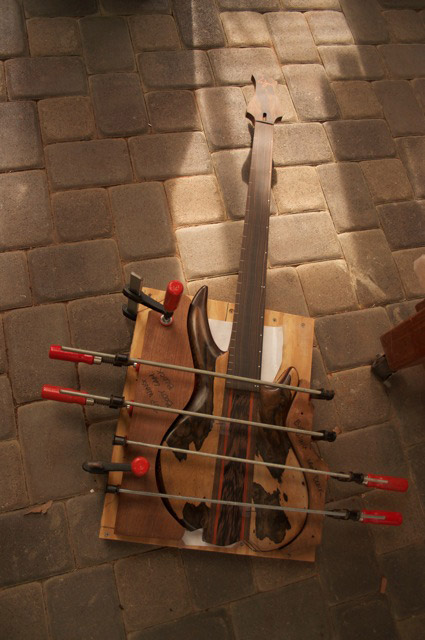
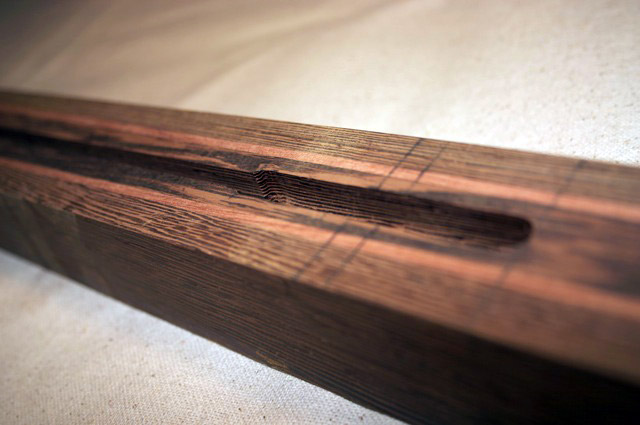
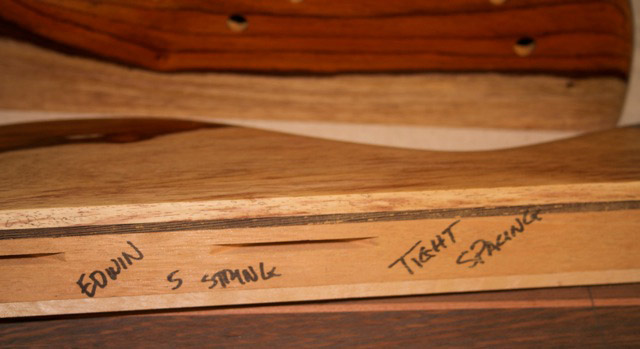
This is a photograph of the edge of a wing before it’s glued to the neck. The two slots that you see are for wood biscuits that will go into the wings and the neck when gluing. This makes the neck and body glue joint extra strong and it helps me to align the body to neck when my over abundance of slippery glue wants to make everything slide around.
click image to enlarge
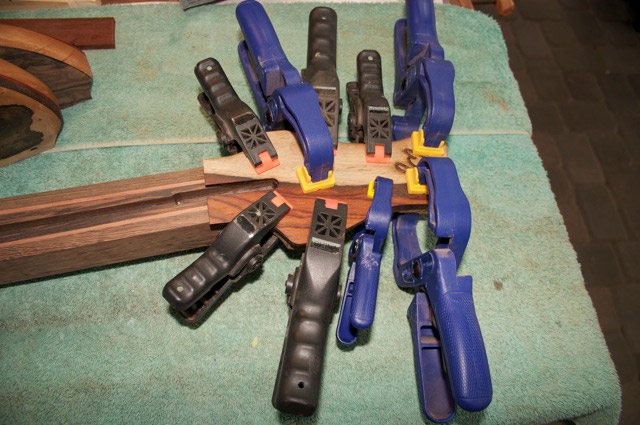
Here I am gluing the headstock cap onto the headstock with Wyn laser cut into the cap. This cap tucks under the fret board so it must go on before the fretboard.
click image to enlarge
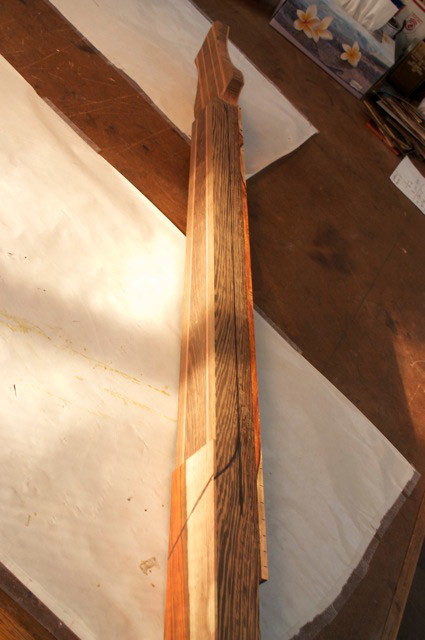
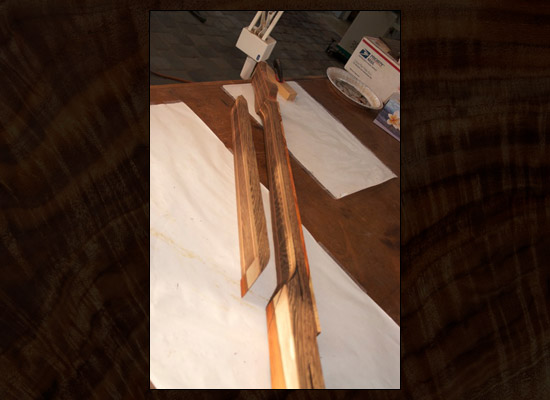
At this point, the headstock shape is cut out, the fretboard has been notched, glued to the neck and radiused. It’s time to start shaping the neck. The pencil line along the edge is to guide my ruff cut of the extra with a band saw.
click image to enlarge
Obviously that just happened. That’s why I didn’t answer the phone for the last five minutes!!!
click image to enlarge
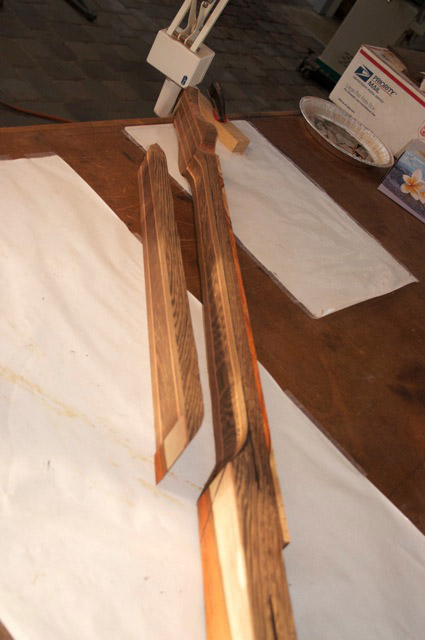
Here I’ve continued to free hand with the band saw, cutting bevels along the sides of the neck. The band saw removes material much more quickly than rasping and sanding. However, not so easy to put wood back so I’m quite careful in this stage to not go too far.
click image to enlarge
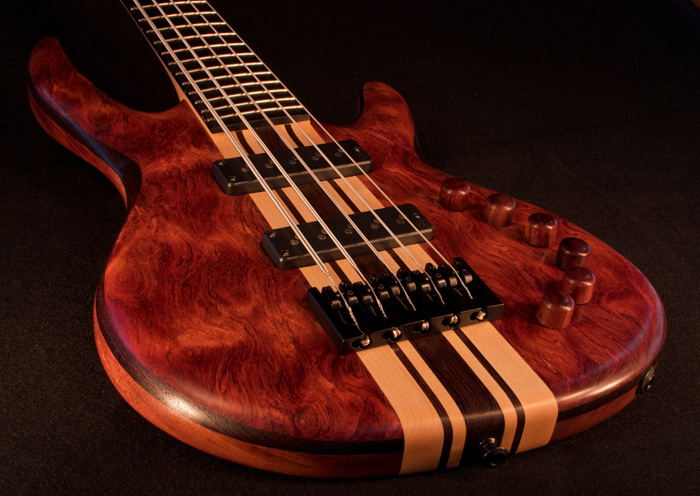
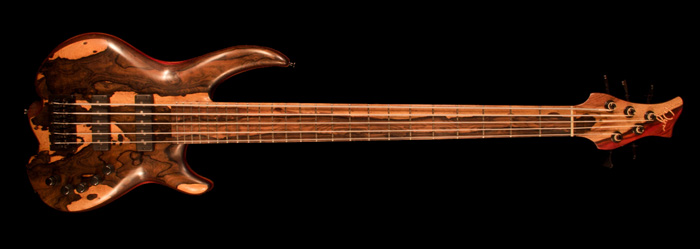
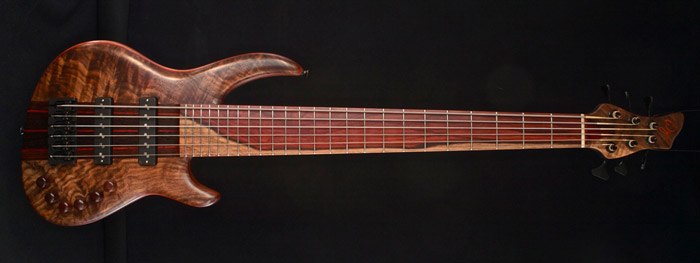
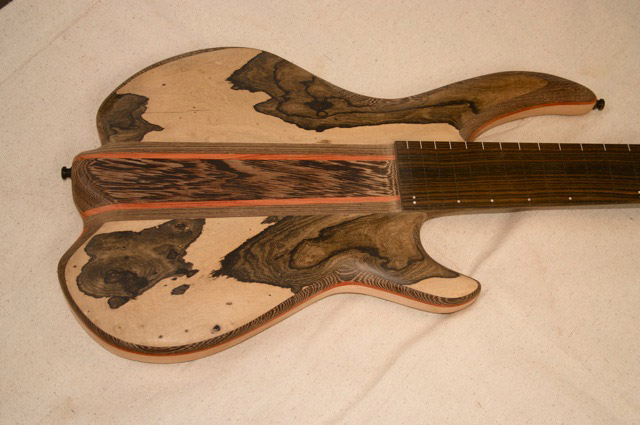
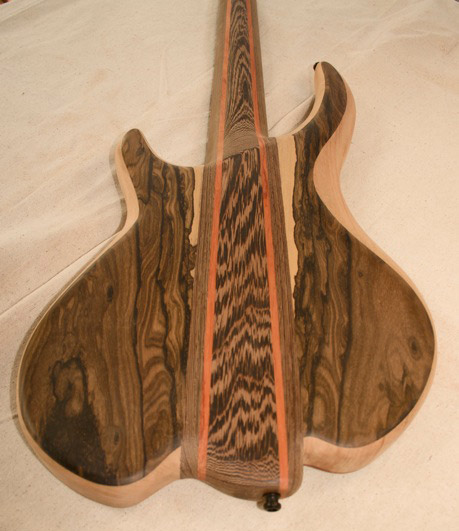
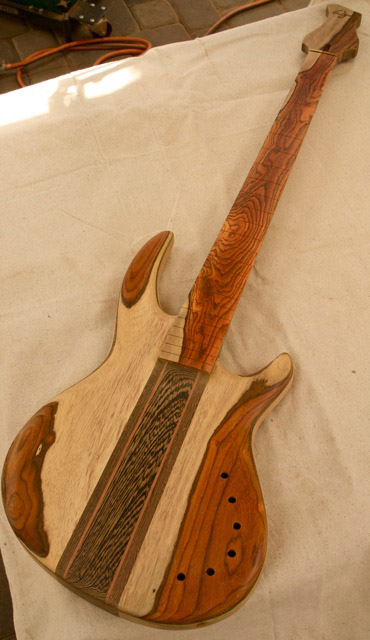
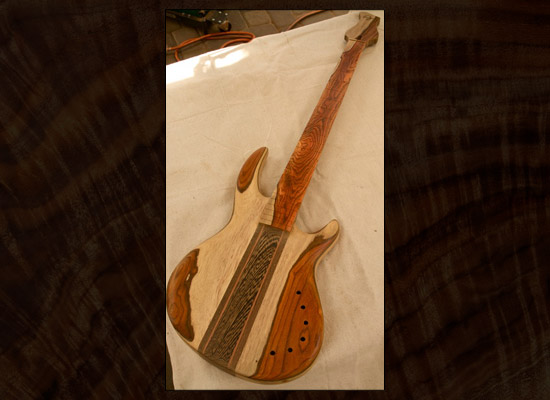
Here we take a big leap forward, I have glued the body wings to the neck and the neck is fully shaped. It’s finally starting to look like a bass guitar. I have gone through lots of wood to find cocobolo pieces that continue a nice design flow throughout the guitar. The light colored wood is the new growth sap wood near the edge of the tree, the red is the heart wood in the tree center.
click image to enlarge
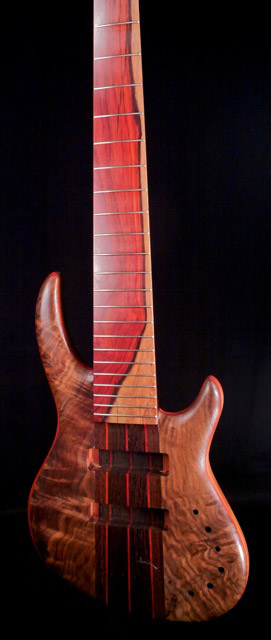
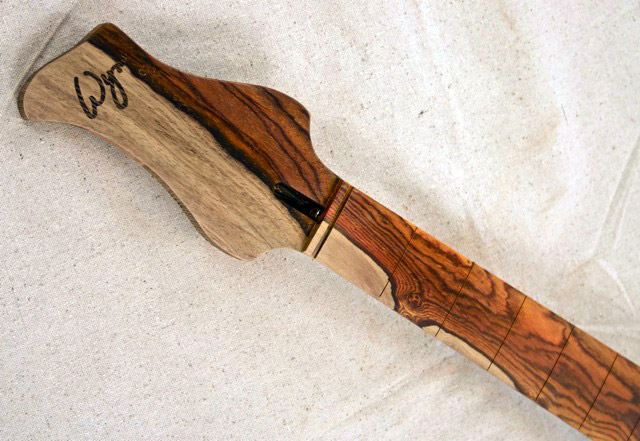
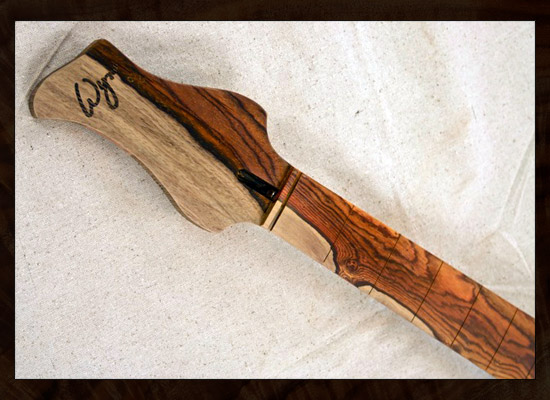
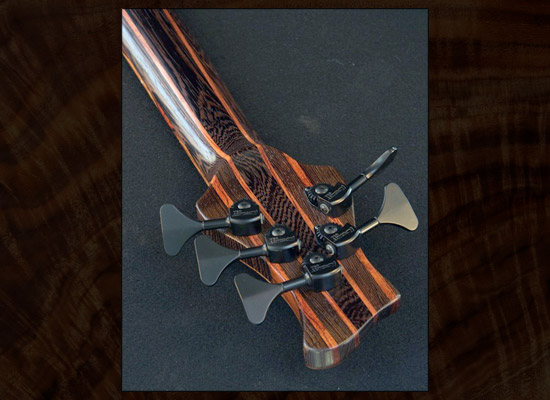
Figuring out a matching headstock to the fret board was some fun. When I found a match, it’s like the final piece of a giant jigsaw puzzle has been put in place. Very satisfying!!
click image to enlarge
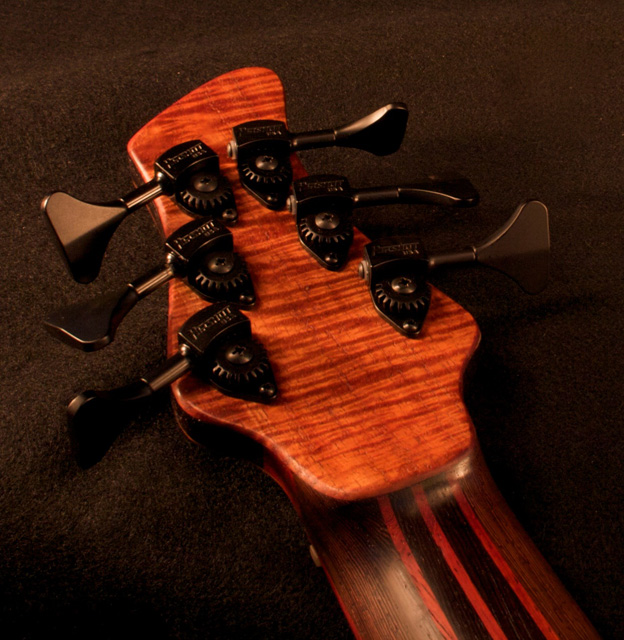
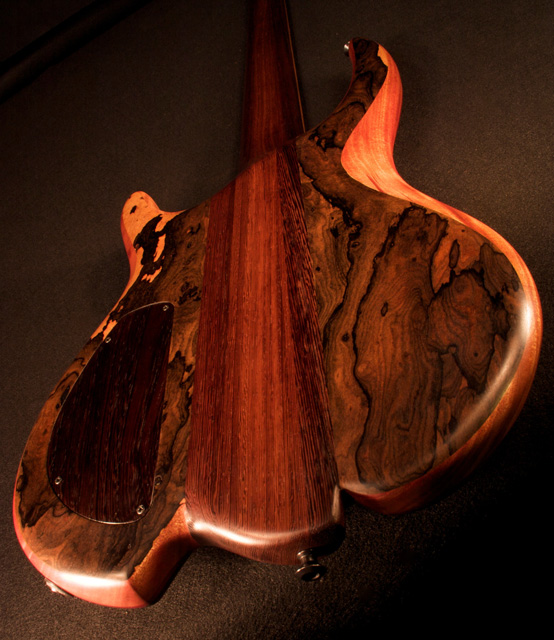
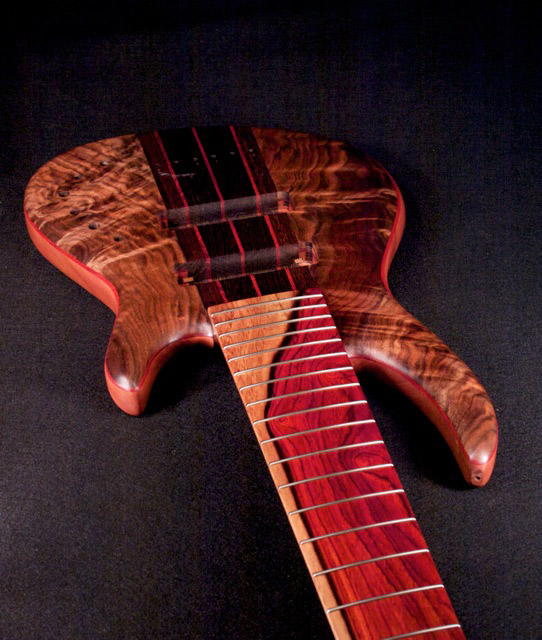
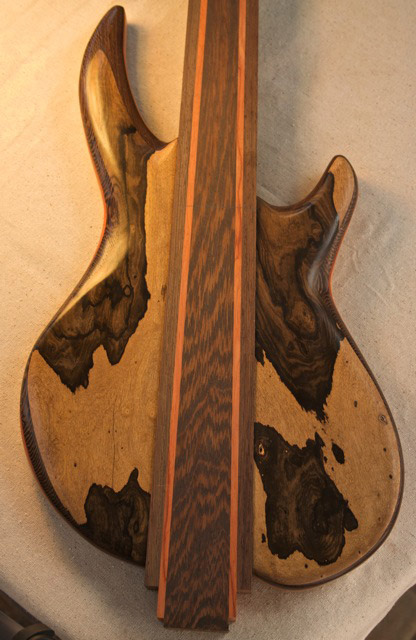
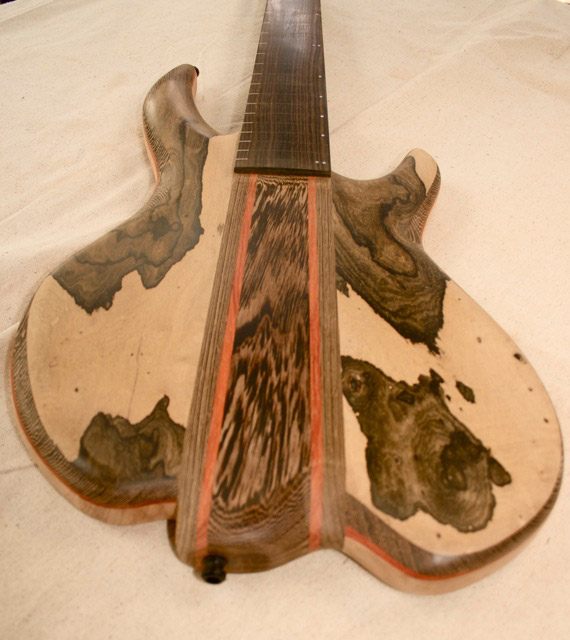
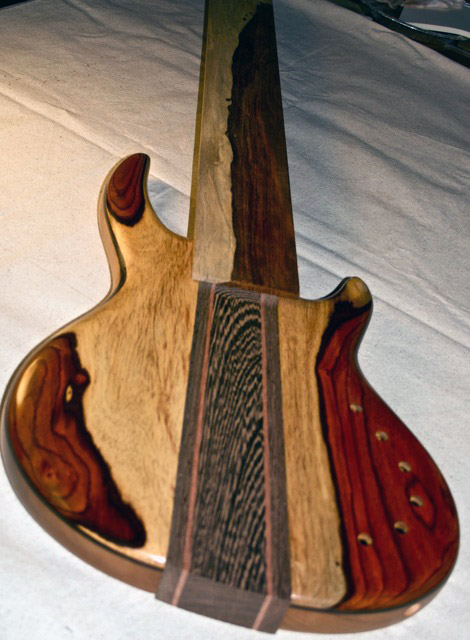
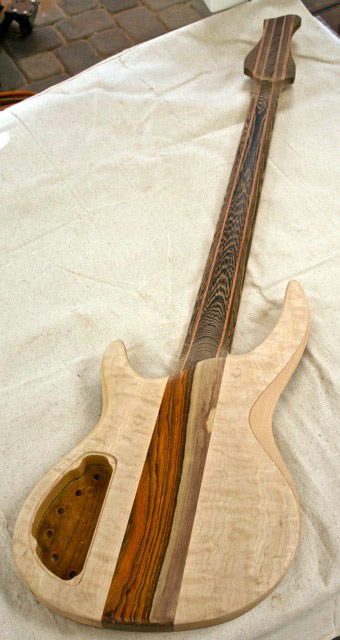
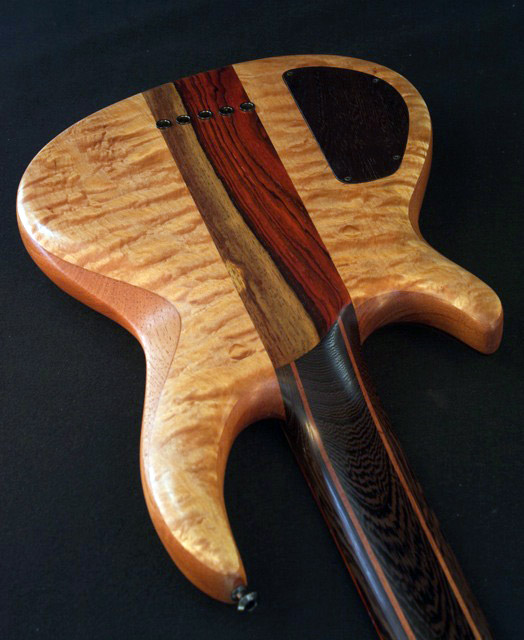
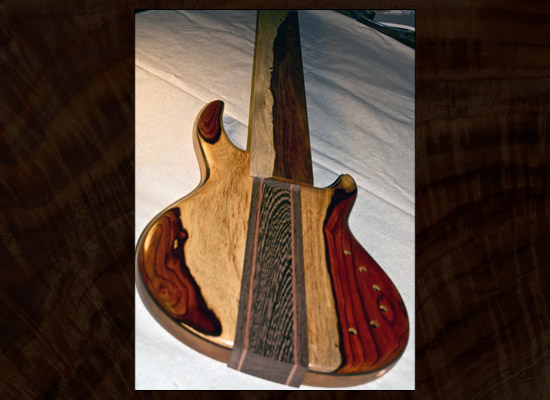
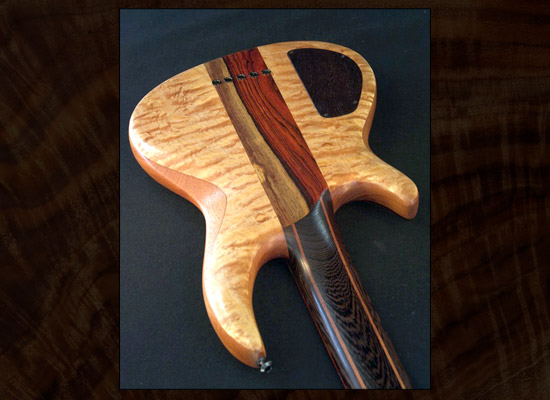
For design and finish, I found a beautiful Cocobolo strip to laminate to the back of the neck through. I know the audience never sees the back of the guitar, but you do!! This is one of those areas that can add a bit of money, (not too much) but really finishes the guitar nicely. To some players it’s quite important and well worth it, to others not so much. Ding ding ding ding ding!!!!! Yes, the correct answer is to PUT THE COOL PIECE OF COCOBOLO IN THERE!!!!
click image to enlarge
It’s fretting time!! The fretboard has a 12/20 compound radius. (there’s a reason for that tricky sounding thing), the slots are spaced just perfectly and it’s time to pound in the frets while super gluing them. It’s a double hold in that the tang on each fret wedges into the slot. But the super glue puts it in there for life and makes absolute solid contact between fret and wood for great sustain and tone. If you’re worried about it, in the event that the bass ever needs a new fret job, the frets can be removed by heating them with a soldering iron which softens the glue enough to safely pull them out. Here the frets have been over cut and are curved, ready for installation.
click image to enlarge
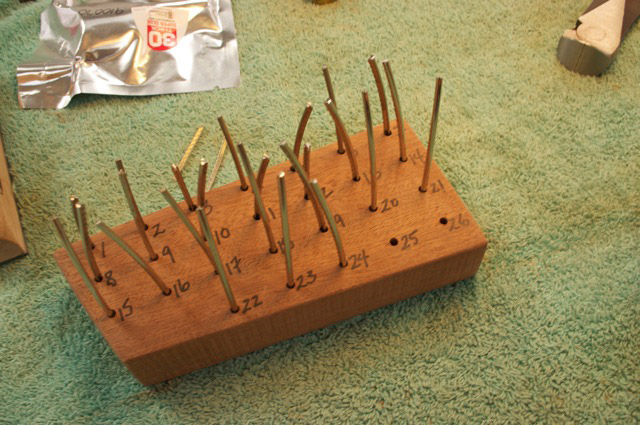
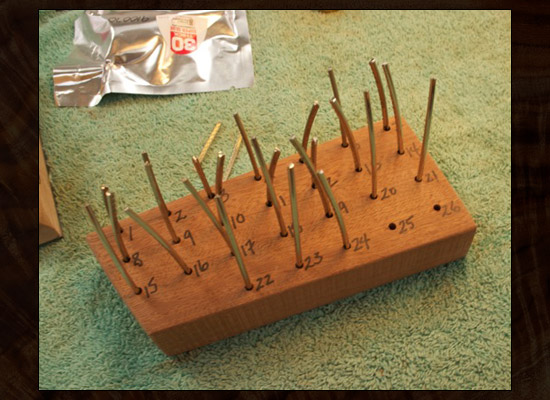
My very clever home made block of wood with 26 holes, numbered so that the frets are ready to go. I grab, glue and hammer one at a time as I work my way up the neck. My neighbors are especially fond of my hammering during my fretting work.
click image to enlarge
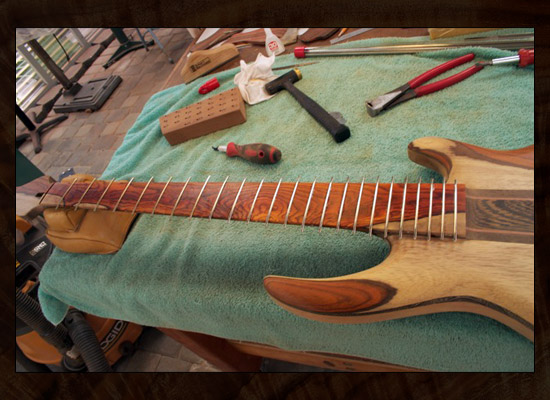
Here they’re installed and glued. After a couple of hours, I clip the extra frets close to the edge of the fret board. Notice the leather pouch under the top of the neck. It’s filled with sand and provides perfect support under the neck as you slide it along centering it directly under where you’re pounding.
click image to enlarge
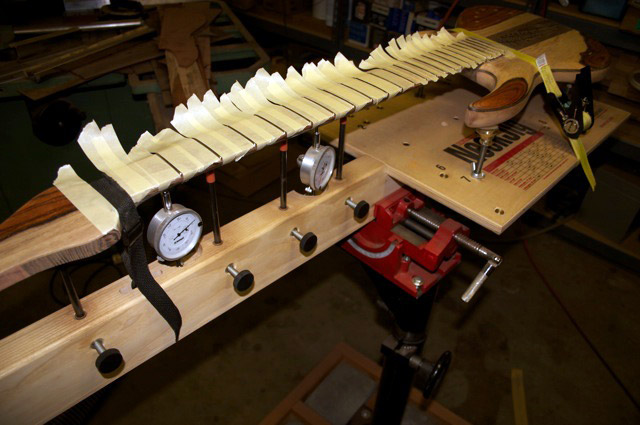
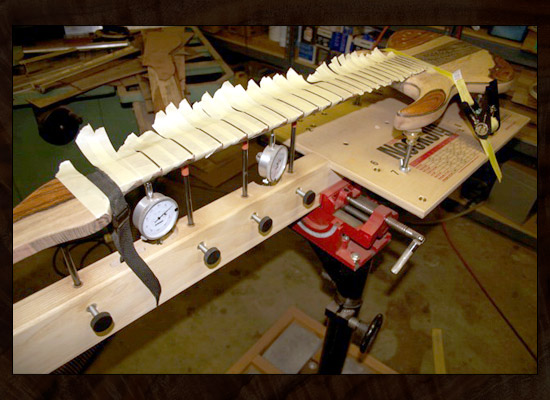
I’m ready to level the frets. I have started with a perfectly straight wooden fret board and I’ve set the neck with the truss rod to be dead straight. Then it is clamped into this Stewart MacDonald neck jig to hold it absolutely solid and straight. I have taped off the wooden portion of the fret board to protect it from metal dust. No matter how perfectly you pound in all of the frets, they never sit 100% flat one to the next. So I am going to use a precision ground 24″ long bar with fine sandpaper glued to it to level the frets. I mark the top of every fret with a black marks a lot. I then proceed to very delicately and slowly sand until I have hit the top of every fret. I can see that because I have just slightly sanded off the marks a lot mark. At that point the frets are perfectly level. After a number of additional sanding and polishing steps on the frets, the guitar should be able to be set up with a nice low action and no buzzing at all on any of the 24 frets.
click image to enlarge
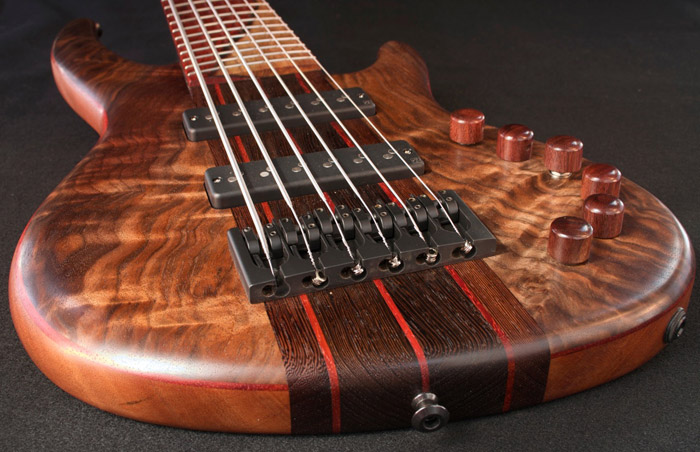
The bass gets my 6 layers of poly oil finish rubbing out between each coat. Then one final rub out with ultra fine sand paper and a wax job. At this point I am able to install all the components from tuners to bridge to pickups and finally strings.
click image to enlarge
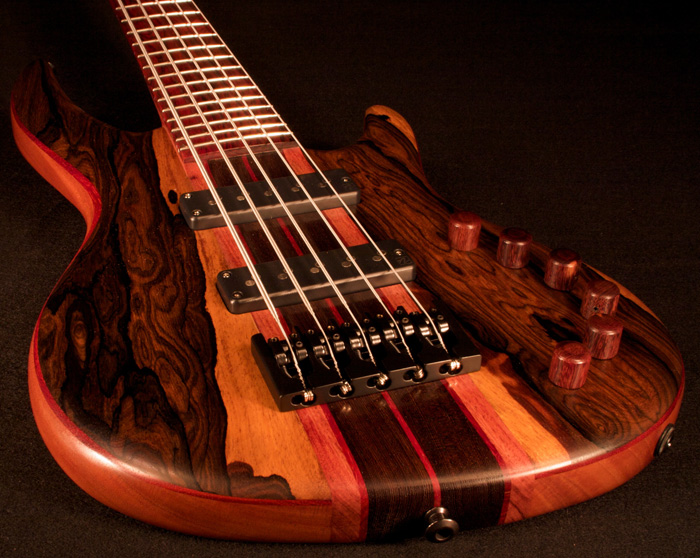
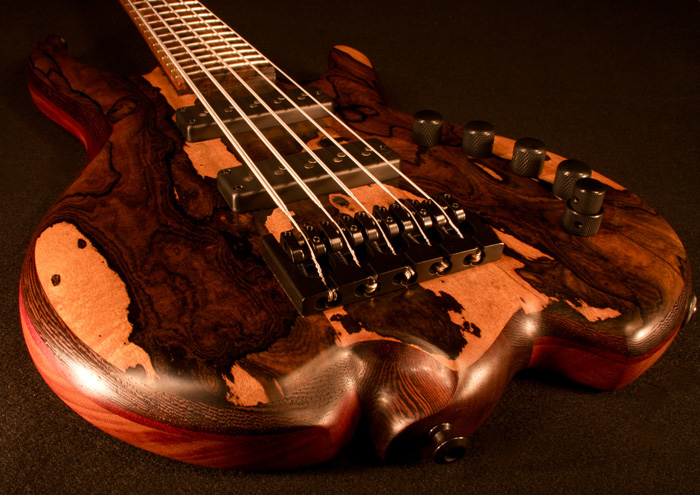
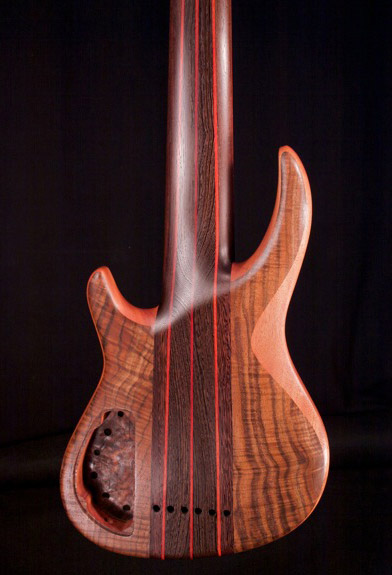
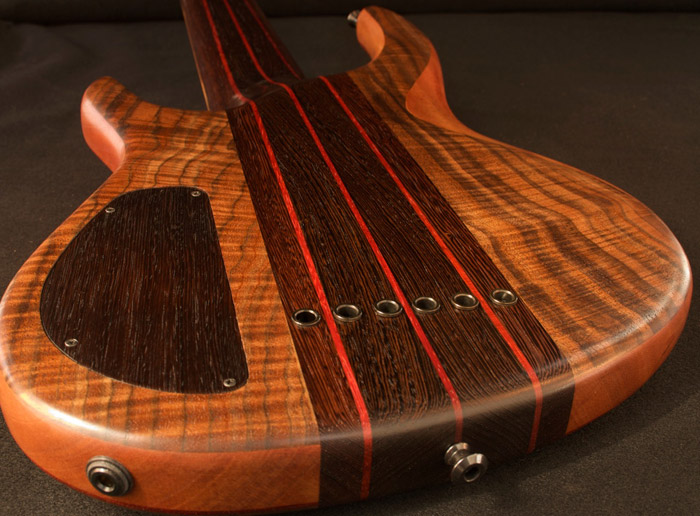
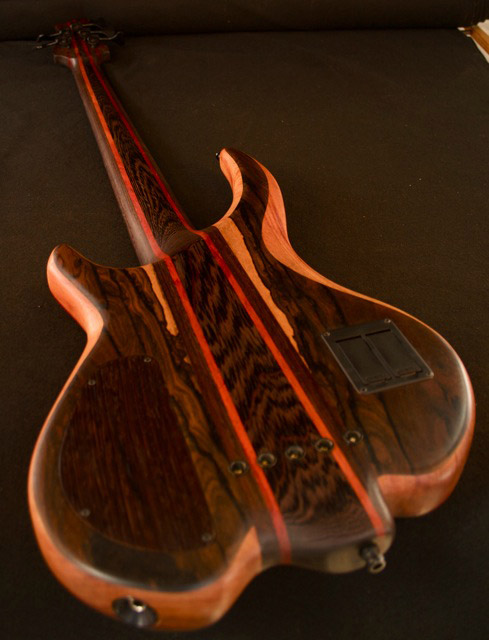
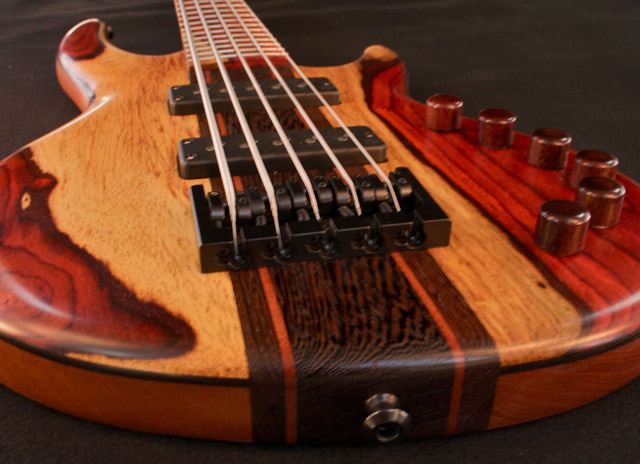
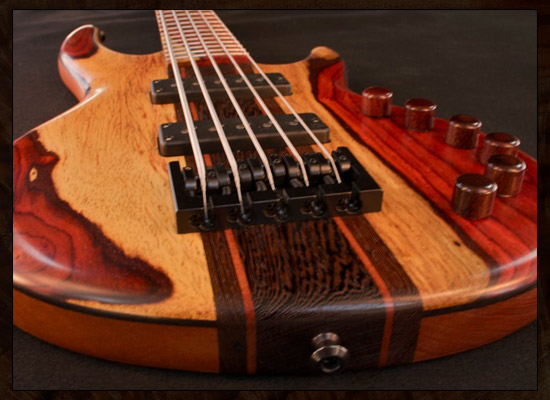
I have included the option on this bass of drilling through the body to allow stringing through from the back. You have the option of installing strings on top at the Hipshot bridge which is easier, or going through the back. The advantage to stringing through the guitar, especially on a 5 and 6-string is that that low B is a bit tighter by stretching the string an extra inch. Also, you pick up a bit more sustain and wood tone from the resonating body.
click image to enlarge
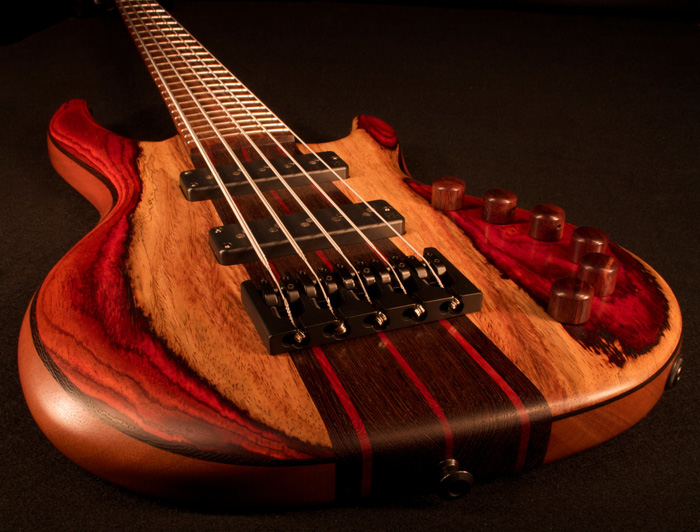
Rosewood knobs, Dunlop strap locks, it’s time to tune it up, set it up and adjust the intonation.
click image to enlarge
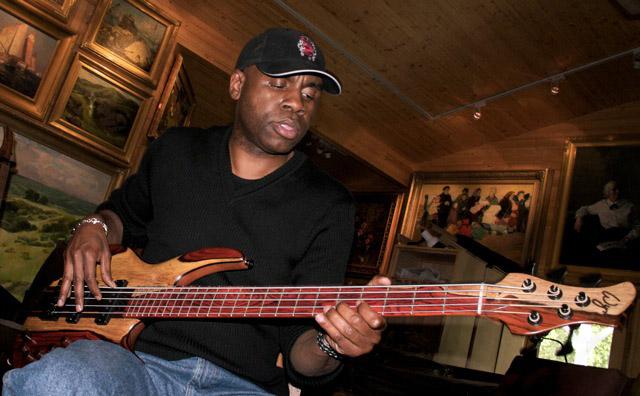
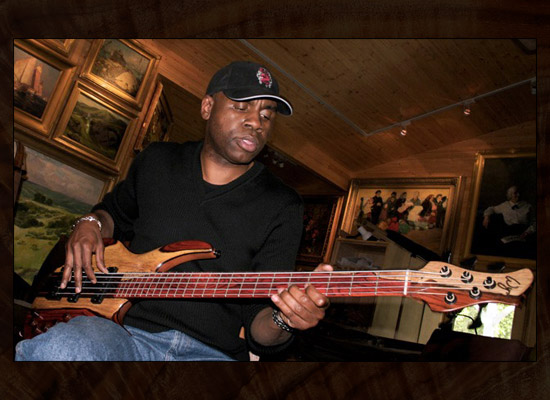
And finally, the happiest most magical moment of all. When that wood and metal sculpture piece I’ve been working on for months actually makes beautiful music!! No better moment than watching Edwin try out his new bass for the first time.
click image to enlarge